People who consume cannabis are some of the most innovative people in the world. Because while there is an overwhelming number of quality smoking tools out there, it seems like pretty much anything can be transformed into a smoking device in a pinch, from apples to soda cans to a gallon jug.
But few smoking methods match up to a properly rolled joint. Once you know how to roll a joint, it’s an easy way to quickly and efficiently consume your cannabis.
Here are the two easiest ways to roll a joint, and everything that you need to do so.
How Much Weed Is in a Joint?
Pre-rolls that you buy at a dispensary will clearly label how much flower is inside each joint (usually a gram). When you roll your own, the amount of weed in a joint comes down to two things: the paper size that you choose and your personal preference.
1 ¼ size joint papers: The most common rolling papers size (whether you opt for Raw, Orange Zig-Zags, or another brand) and arguable the easiest to use. The size refers to the width, and the pores are three inches long. These typically hold between a half to a third of a gram of cannabis and are good for one to three people.
Single wide: Cigarette-size papers that are one-inch wide (hence the name). These are less common, with one of the most available options being White Zig-Zags, but are a good option if you’re looking for a slimmer joint that doesn’t have too much paper.
King size: The largest size commonly available, though the true size varies by brand. Expect to fit between a gram and a gram and a half in a king size rolling paper. Note that the bigger the paper the more difficult it is to roll.
Everything You Need to Roll a Joint
Rolling papers: Pick the appropriate size based on your experience level and how many people you’re smoking with.
Cannabis: There’s no joint without weed. Depending on the size of the joint you’re looking to roll, you’ll need between a half gram to a gram and a half. Make sure to pick out the stems as they’ll poke holes in the paper.
Packer: While optional, a packer will make your joint tighter and cleaner. It can be anything skinnier than the width of the joint you’re looking to roll. A pencil, pen, chopstick, or match are all good options.
Grinder: You need well broken up weed to roll an even burning joint. Grinders are the best option because they’re fast and uniform, but breaking the cannabis up with your fingers or chopping it with a knife will also do the trick.
Filter (also called a crutch): Some rolling paper brands include filters or crutches in the packaging, but any piece of thick paper or card stock will do.
How to Roll a Joint: The Easiest Method
1. Grind the Flower
The best cannabis to use for joints is evenly ground flower. A grinder makes for the most consistent results — plus many grinders have a compartment at the bottom to catch leftover kief. That said, any way that you can break your flower up into small even pieces will do, whether that’s using your fingers, scissors, a knife, a credit card, or anything else you can get your hands on.
2. Make Your Filter or Crutch
A crutch, a name often used interchangeably with filter, is the paper at one end of the joint that keeps pieces of weed from getting in your mouth, allows you to smoke the entire joint without burning yourself, and helps define the shape of the joint. In short, it’s a whole lot of use for something so simple.
To make a crutch or filter, start with a piece of thick paper or card stock that’s about the size of the last digit of your thumb. A thin business card works well, as does the cover of your rolling papers or a stiff magazine cover. Some brands come with paper for a crutch.
To make one, fold the sizes down strip like an accordion three to five times. Then roll the remaining bit around the folded part. Put it on the same side of the joint as your holding hand with the glue side of the rolling paper facing you.
3. Add the Weed and Roll
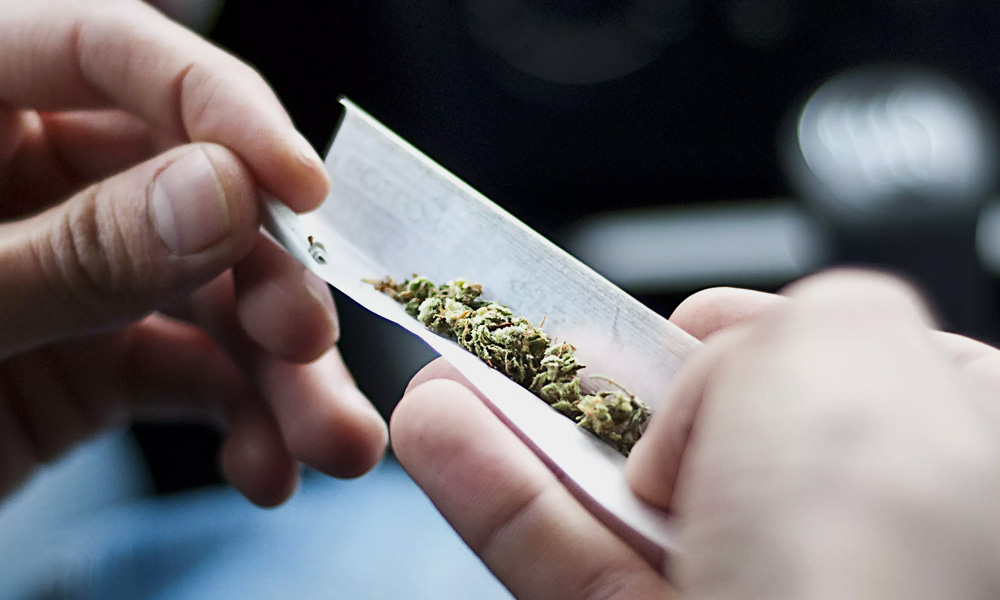
After you have the crutch, add your ground up weed. Start by putting it in the middle and spreading it out evenly. If you’re looking to make a cone shape, add less on the side with the crutch.
Then pinch both sides of the paper together and move each side of the paper up and down to make the cannabis uniform and tightly packed. You don’t want it so tight that it doesn’t easily burn, but also not so loose that there are big air gaps.
Finally, tuck the end of the paper that doesn’t have any glue into the crease between the cannabis and the other side of the paper. Lightly lick the glue side and roll until the glue side makes contact with the rest of the joint.
4. Pack and Seal
At this point, there will be an opening on the opposite side of the crutch. The cannabis inside will be looser than the middle parts, and some may have fallen out during the rolling process. That’s when packing comes in handy. Using your pack of choice (pen, chopstick, match, whatever), slide it into the opening and tamp down the top.
Lastly, twist the tip of extra wrapping paper at the top to seal it until you’re ready to enjoy.
Alternative Ways to Roll a Joint
There more than one way to roll a joint. You can watch one expert whip up what seems like the perfect joint in seconds using one method, and then see someone else take a different tack entirely but end up with just as perfect of a joint.
As an alternative to the above method, another common way is how known cannabis expert, Houseplant founder, and movie star Seth Rogen rolls his joints.
Instead of starting with the crutch, add the desired amount of weed into your paper and roll it. Twist one end of the joint to seal it. Then take your crutch and roll it tightly before inserting it into the other end of the joint and letting it expand naturally to the width of the joint (make sure not to do the accordion fold, as that method doesn’t work as well in this case).
When done right, this method eliminates the need for a packer because the crutch tightens the joint against the twisted end when you push it in.
Whichever method you choose, practice makes perfect.


