Last week, we introduced you to our partnership with Motorcycle Mechanics Institute and our plan to buy an old motorcycle, freshen it up and get it running, and turn it into our office bike. Well, we did our research. We read a lot (A LOT) of forums regarding bikes that are easy to find and easy to find parts for. We followed our budget. Now it’s time to introduce you to our bike.
This post is sponsored by Motorcycle Mechanics Institute. For more information about graduation rates, the median debt of students who completed the program and other important information, visit www.uti.edu/disclosure
The Bike
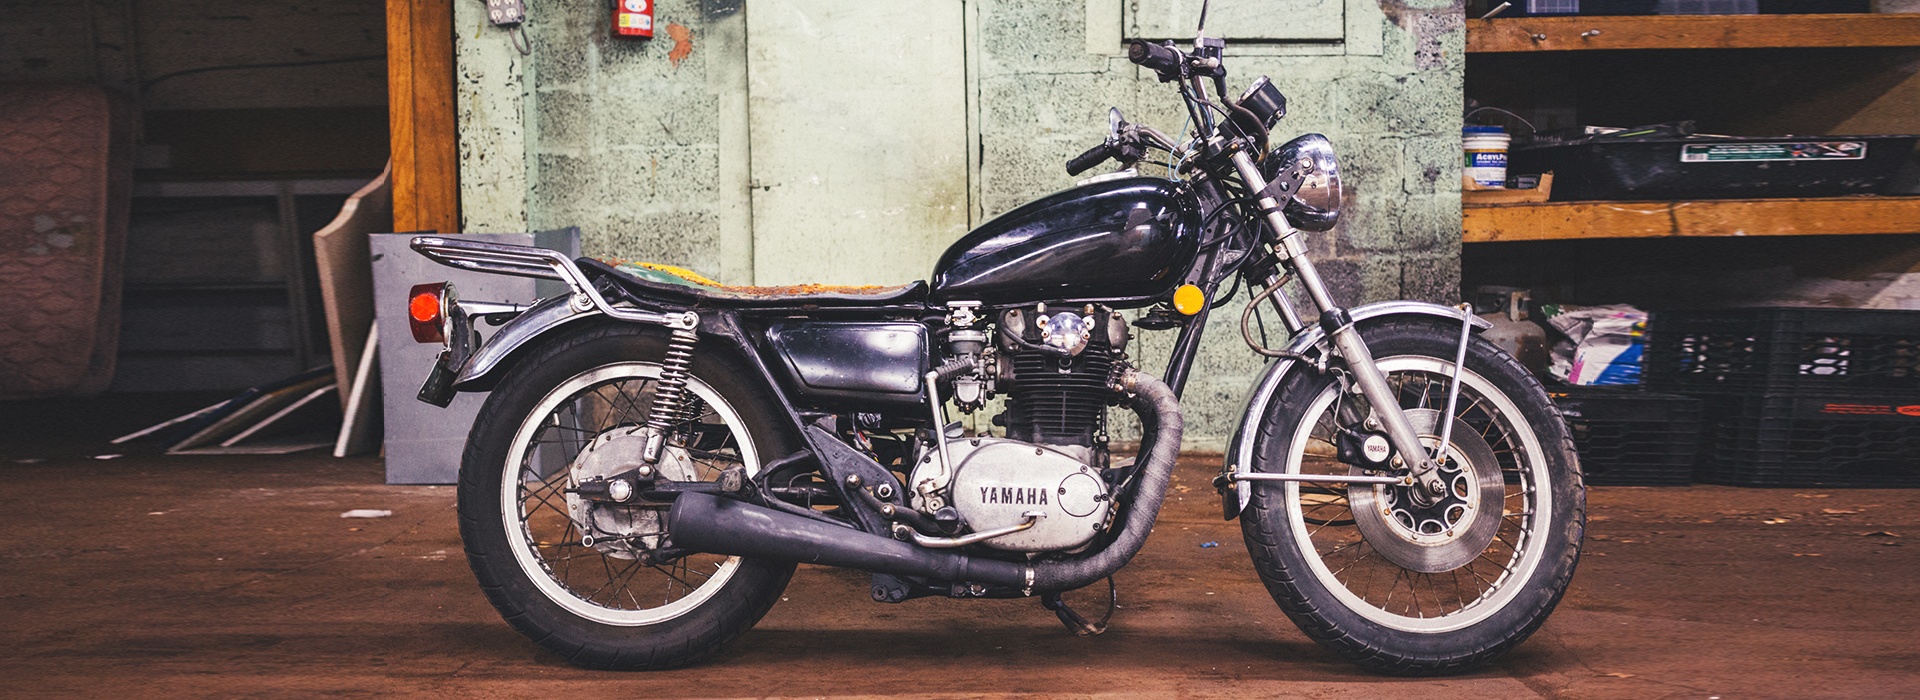
After all our research, we decided to focus on a Kawasaki KZ series, Honda CB Series, or Yamaha XS Series. Each could be had for a price that jived with our budget, and each was popular enough to allow for easy part finding. Without too much hunting, we came across a 1976 Yamaha XS650 on Craigslist for $800. Sold.
The previous owner, the man who sold us the bike, had planned on taking the bike all the way through restoration, but time and money kind of got in the way, as they often do with these sorts of things. With some helpful info on the bike’s condition from him, we started to map out a plan for getting it on the road.
The Inspiration
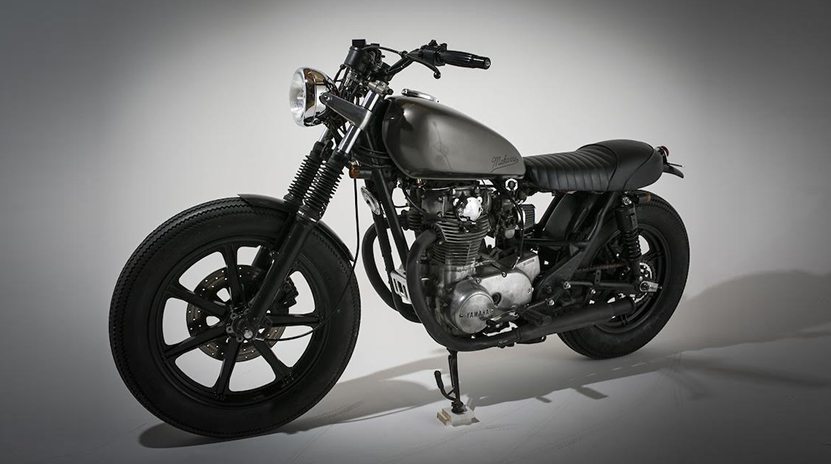
What we’re inspired by is a brat build. Brats are said to be half cafe and half chopper, but really it’s the simplification of the bike that we like the most. Our goal is to end up with a bike that’s a bit more opened up than the original and with a slightly more aggressive stance. It’ll be good for getting around the city and comfortable enough to take on the highway. Here’s a shot of such a bike:
Maintenance Required
Here’s a (somewhat) brief rundown of the work our new office bike required:
- Wiring and Electrical: This is where the previous owner hit a wall, got frustrated, and decided he was willing to part with our classic Yamaha. Our bike came to us with a pretty big issue: it was blowing the main fuse while running. Yeah. That’s kind of a big deal. Luckily, we knew we had the cash to buy a new wiring harness, and we could even rewire the bike from scratch, if need be. This model is hugely popular in the customizing community, so there are plenty of schematics to follow. But, without question, the biggest issues we were going to face were wiring and electrical—new spark plugs, perhaps ignition coils, and maybe some work on the charging system.
- Bearings: Our bike is 40 years old. It’s seen some things. The bearings need a facelift.
- Suspension: Speaking of a smooth ride, how about that suspension? Originally, the bike featured straight springs in both the back and front suspension. To improve the ride, we’re going to toss on progressive wound shocks and springs in the forks, which will help soak up smaller bumps but firm up if we come across a pothole.
- Gaskets/Seals: Truthfully, the bike is mechanically sound, so we’re not going to dive too deep into an engine rebuild. That said, we picked up a full gasket set and oil seal set in case we come across flimsy gaskets or ancient ones stuck to the engine.
What We Need
To save ourselves trips to the auto parts store, we picked up a box of metric nuts and bolts. We also stocked up on degreasers, electrical contact cleaners, carb cleaner, and lubricants.
As for tools, we need more than a standard home kit. We acquired a proper socket set, Allen wrenches, and quality screwdrivers. Stripping a bolt because you didn’t have the right tool is the WORST feeling in the world. Not only do you have to deal with the damage, but it could easily have been avoided.
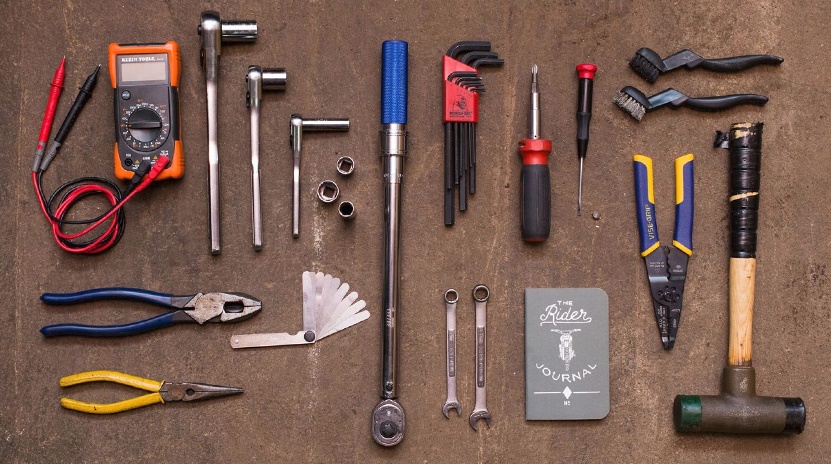
We also got our hands on a quality torque wrench. It’s good peace of mind knowing the bolts holding your engine together (you know, the thing that houses controlled EXPLOSIONS) are tight.
Basic electrical tools like wire strippers/crimpers will be necessary for our rebuild, and if we choose to do the wiring from scratch, a soldering iron will help. Not skimping with wire nuts on this guy. A decent multimeter will help us diagnose any electrical issues that come up as well as check the charging system and battery to make sure it’s in spec.
Finally, perhaps the best tool we discovered is a Factory Service Manual (FSM). We ordered one repair manual and downloaded a copy of a FSM for our bike. These two books are priceless. Best of all, it’s nice to have something to refer to when a problem arises that doesn’t require us greasing up our smartphones.
Customization
We’ve got a fantastic base for our build but want to add a little something to make it our own. Like we mentioned before, we’re going for a brat style bike. It doesn’t require frame modifications, but it will change the stance a bit and bring it into line with the current aesthetic of custom bikes. Also, it should be noted, some tinkering is both for customization and maintenance. For example, the seat is no longer padded and some parts show quite a bit of wear. Obviously we wouldn’t buy an original seat only to replace it with a custom one.

One cool thing about bikes with a kick-start option is the ability to use a small battery or remove it all together. We love the open frame/minimal look of some of our inspiration builds, so the goal is to make the bike kick-start only, which allows us to hide a small battery somewhere. Then we can ditch the starting motor (simplifies wiring) and move to using pod filters instead of an airbox. That will require some carb work and possibly new exhaust. Also we want to keep the controls to a minimum so a new speedometer and mounting plate will go up above the bars. Speaking of bars, with the tighter stance we’ll want to get something a little more on the street style, nothing low like on cafe racers but something that keeps us upright as opposed to laid back.
That’s where we stand right now. Next week we’ll bring you Part 3 of The Cool Material Bike Build, and we’ll start to get our hands dirty.
