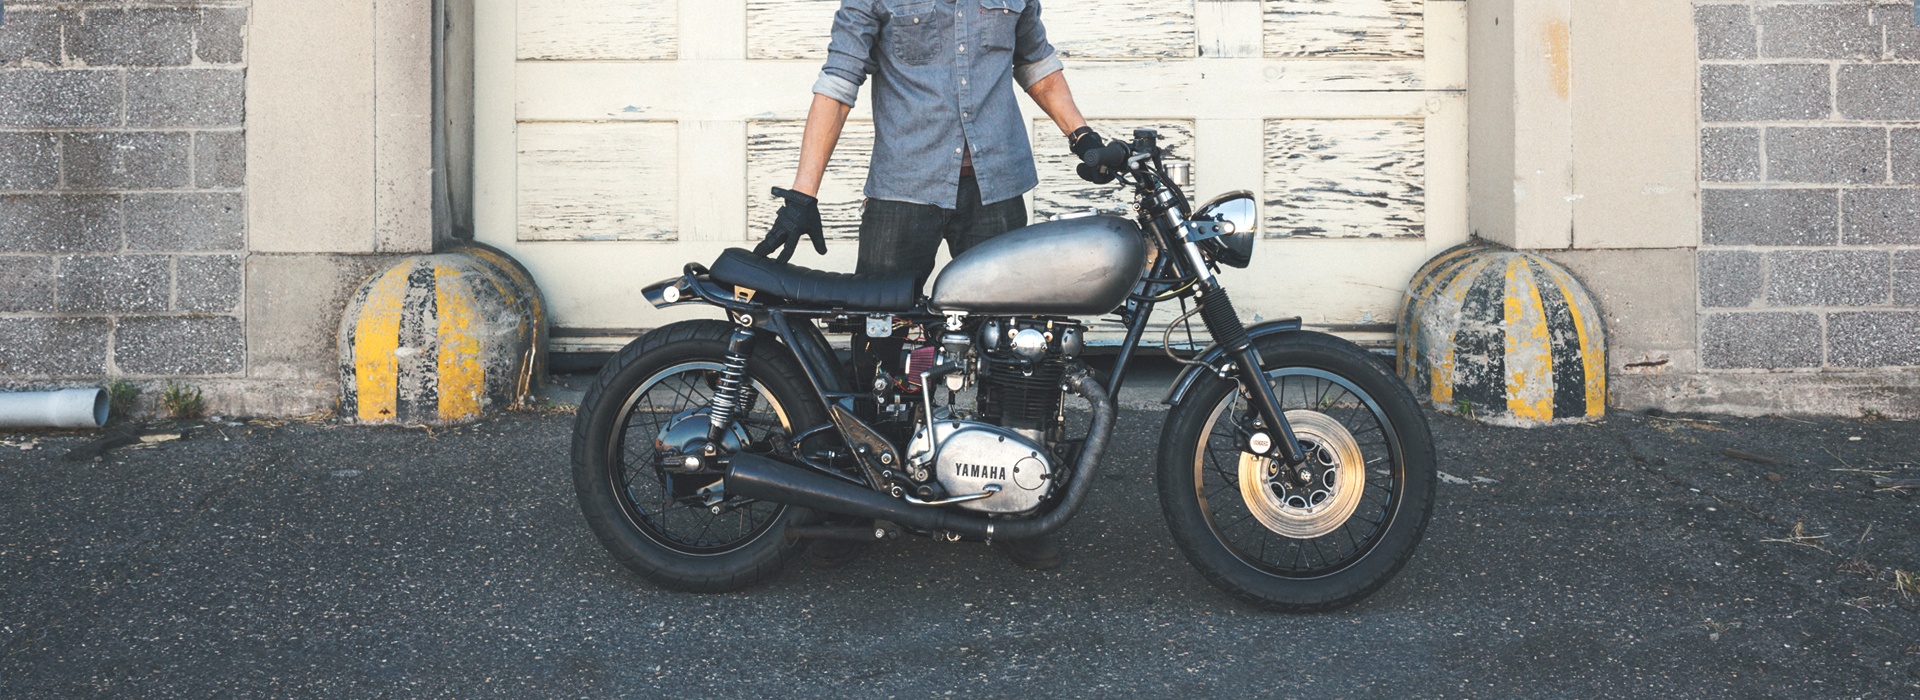
About a month ago, we had this idea of building an office bike, a motorcycle we could all use for quick trips around town. It was a pipe dream, really. We needed time and money, so we dropped the idea. Then we got to talking with Motorcycle Mechanics Institute, and the idea of making this bike a reality seemed plausible. Over the course of the last four weeks, we’ve brought you along for the ride. (Here are the previous posts: The Project and the Plan, The Bike, Get ‘Er Going, Customization.) Now we’ve reached the grand finale. The big reveal.
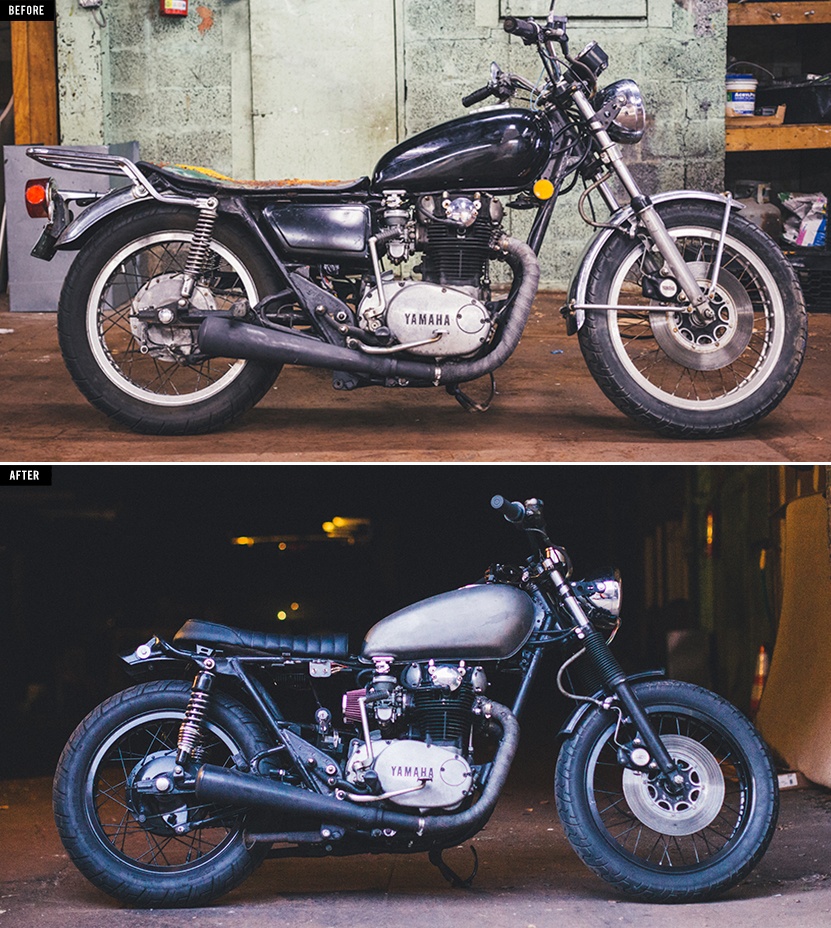
This is our office bike.
![]()
This post is sponsored by Motorcycle Mechanics Institute. For more information about graduation rates, the median debt of students who completed the program and other important information, visit www.uti.edu/disclosure
Music to our Ears

Putting so much into this machine has had us itching to see what she could do. With everything in place, it was time to start her up. We held on tight and jumped on the kick start… Nothing… One more time…
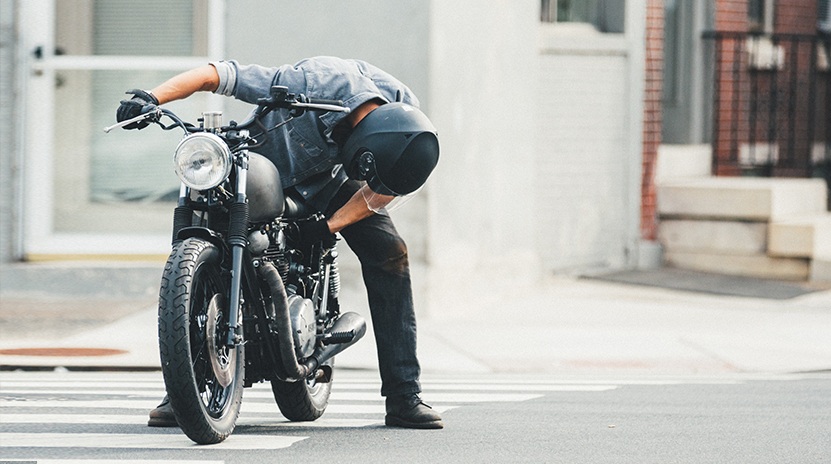
An engine never sounded so sweet. Of course we revved the engine quite a bit to admire our handiwork. This was weeks of work coming alive! The first thing we love about the bike is the sound. We started with the idea of making a brat and that’s precisely what its exhaust reminds us of. Along with the stance and handling we built an aggressive ride that’s wholly unique to our style.
It was almost hard to believe that we’d come this far. The month has been a whirlwind of late nights in the shop and midday tinkerings. We’ve scrubbed our hands countless times. Now it was time to take her for a spin.
A Minor Hiccup
One issue isn’t bad when you consider how much work we did, right? OK, good. Our ride was cut a little short when we lost all power to the bike. They say you don’t really own a bike until you’ve pushed it somewhere. Well, we’re happy to say we own a bike. We pushed it back to the shop and noticed the rotor in the charging system wasn’t giving us enough juice to sustain a ride. Simple fix, but one that requires a rotor we needed to order.
The Open Road
Once the rotor came in it was simple enough to swap out the part and check the charging system. Granted, when we removed the old one it was obvious that we should’ve replaced it right away. Live and learn. With the new rotor in everything seemed solid, but we might be carrying an extra battery on rides for a while. Good thing we picked a small one!
Mechanically, however, we must’ve done something right because this bike could rip! The throttle is super responsive and the temptation to do a wheelie was a hard one to control. You can take a look at our bike in action in the photos above.
The Payoff
Our budget ($2,500) was not an outlandish one, but we could’ve spent three times that much on performance parts, engine modifications and professional paint jobs. The easy route is often the most expensive one. We wanted to show that it’s possible to make something great for a reasonable amount of money. But more importantly we wanted to do it ourselves. We wanted to start with an affordable vintage bike whose glory days seemed to be behind and make it fresh again. It was about the process and knowledge gained about the bike—our bike. We could’ve dropped her off at a mechanic and spent thousands more to get the bike how we wanted it, but because we did the work ourselves, we know the bike through and through.
You can’t put into words the kind of joy you get from something you worked on with your own two hands. It’s an amazing feeling knowing you’re solely responsible for making a machine that can take you anywhere. Whatever we write here won’t get that point across. The project had its challenges and frustrations but as soon as the engine fired up all those melted away. You want to break up the mundane of life? Ride a motorcycle. You want to love that motorcycle even more? Build it yourself. It gets you turning wrenches and using your head at the same time.
It’s been a hectic, month-long journey with a lot of ups and downs. And we’d do it again in a heartbeat. For now, though, you’ll find us riding our new office bike around Cool Material HQ.
Last Minute Parts: New Rotor ($120) + Headlight ($110)
Budget: $2,500
Total Spent: $2,430
Photos: DJ Dohar