

If you’re looking to add some interactivity to your next dinner party, there are few better ways than having folks shuck their own oysters. Invite friends over for a backyard oyster fest and it’ll be the party of the year. But, we’d recommend a little preparation and care before you whip out an oyster knife and get shucking. If you aren’t careful, shucking an oyster can go sideways real fast. So, we’ve put together a handy guide on how to shuck oysters without hurting yourself.
Everything You Need to Shuck Oysters
Before you get shucking, there are a few pieces of gear we’d recommend acquiring.
Gloves – While not strictly necessary, a decent pair of gloves will help maintain a grip on the slippery shells of oysters and keep you protected while you shuck. That being said you don’t want an unwieldy pair of work gloves. These cooking gloves are an excellent option, will keep you dexterous, and at less than $12 very these are reasonably priced.
Oyster Knife – An oyster shucking knife is a unique tool aimed to be able to fit between the narrow opening of the shell and pry the oyster apart. These powerful knives also tend to be sharp so be careful while using them. There are plenty of well-priced options available online like this colorful oyster knife from Toadfish or this simpler one from Rockland Guard which also includes a pair of gloves. Or if you want something a little more impressive, seek out some handmade wooden options like this beauty made by Virginia’s Hand Crafted Knives.
Kitchen Towel – Shucking oysters is a messy process so having a kitchen towel handy is a must. Additionally, placing your oysters on a towel will help keep them in place while you work your oyster knife in. The pro-move is to lay your kitchen towel on a hard surface like a large cutting board before you begin shucking.
Where to Buy Oysters
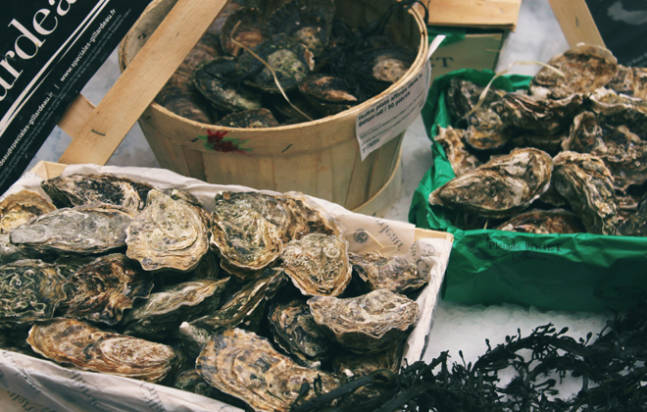
If you live on the coast, you should absolutely check out your local seafood markets for some fresh oysters. You’ll want to see the oysters resting on ice and they shouldn’t be out of the water for more than a week or so. The fresher the better. It’s fairly safe to buy oysters year-round but you’ll find the best ones from mid- to late fall and even into the winter.
You can even shop for oysters online from reputable farms/resellers. We’d recommend checking out Island Creek Oysters up in Duxbury, Massachusetts or White Stone Oysters in Foxwells, Virginia.
What Are the Different Types of Oysters?
While you might find a plethora of different oyster varieties, the two main types of oysters to look out for are East Coast and West Coast.
East Coast oysters will be saltier and more savory with a strong briny flavor. The shells themselves will often be a bit narrow and will have a more chewy consistency. Some common East Coast oyster varieties are White Stone, Wellfleet, and Blue Point.
West Coast oysters are rounder and deeper and tend to have a sweeter with a creamy texture. You might find some more vegetal flavors in a West Coast oyster. Common West Coast oyster varieties include Olympia, Kumamoto, and Pacific.
How to Shuck an Oyster
Now that you’ve grabbed your oysters, let’s get ready to shuck. While you might be tempted to speed through the process we’d recommend starting slowly. Once you get into the rhythm, you’ll be a shucking pro in no time.
Before you start shucking an oyster hit it to see if it’s hollow and to make sure the shell is intact. Give it a sniff and if it smells like rotting fish, definitely discard it.
Step 1: Place your oyster flat on a towel or cutting board
Pick out your oyster, wipe it down, and place it firmly on your flat surface. Pros will often shuck it right in their hands but we’d recommend the security of a kitchen towel over a hard cutting board.
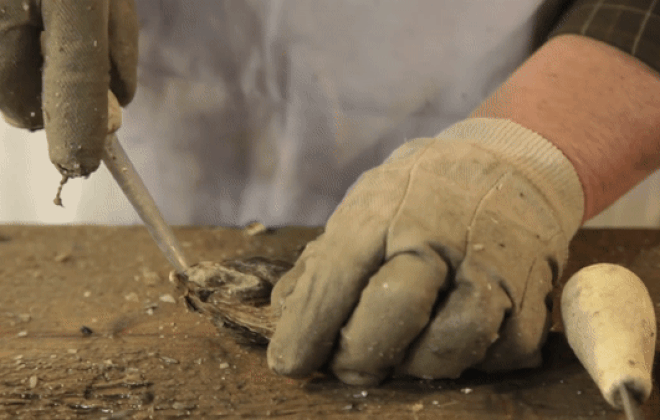
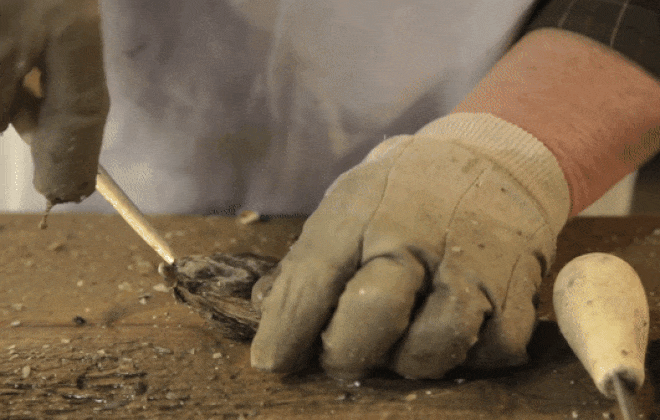
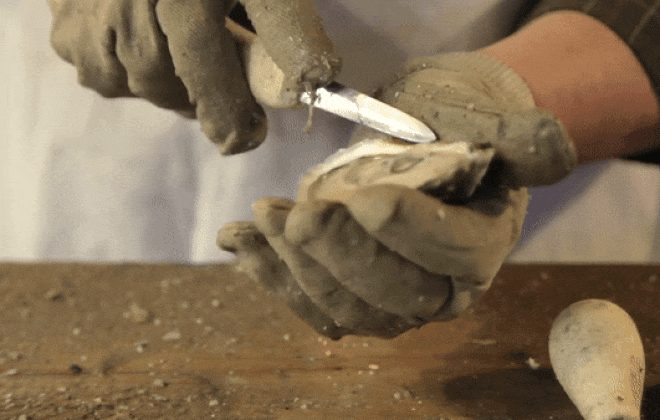
Step 2: Insert shucking knife in hinge
Wiggle the oyster shucking knife into the hinge, of the oyster shells.
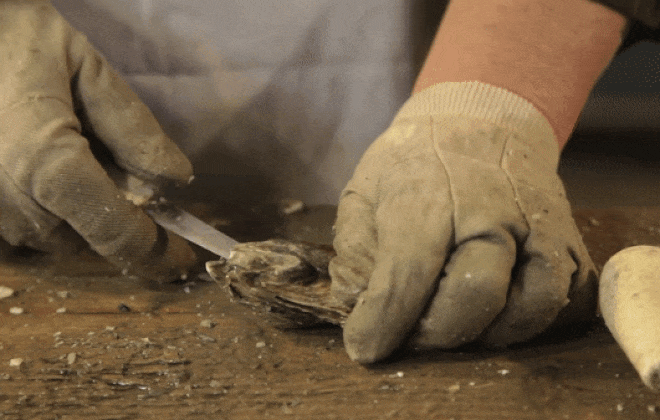
Step 3: Twist the knife in the shell
Once you’ve got it securely in, apply pressure while twisting and then snap the shells apart. When you’re first starting out it’s ok to take your time with this step. Before long you’ll be snapping off shells seamlessly.
Step 4: Separate the top shell from the bottom
After you’ve worked the two shells apart, discard the top shell.
Step 5: Cut the oyster from the bottom shell
Wipe down your oyster knife and separate the oyster meat from the bottom shell.
Step 6: Enjoy!
Slurp these down one at a time or arrange them for your guests over some crushed ice. Or, if you don’t want to eat them raw, try grilling or baking your oysters.